Post by beee(: on Sept 20, 2009 14:13:12 GMT -5
YAY TUTORIALS.
coloring #1
people requested this. so here we gooo.
this is NON-TRANSLATABLE.
it will work only on any version of photoshop. [not for photoshop elements. i don't think that has selective coloring.]
i use photoshop cs3 extended.
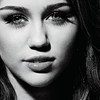
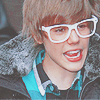
how to go from
 to
to 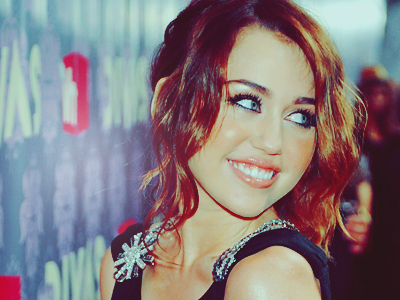
1. sharpen your base if needed. then duplicate your base and set to screen 50%. you can adjust the opacity depending on how dark your picture is.
2. make a new selective color layer. [layer > new adjustment layer > selective color]
reds:
-100
+18
+17
+17
yellows:
+100
+22
+100
+13
neutrals:
+35
+14
-11
0
3. make a new color balance layer. [layer > new adjustment layer > color balance]
midtones:
-34, +6, +16
shadows:
+17, +8, +18
highlights:
0, +12, +11
don't do anything to the preserve luminosity box, just leave it checked
4. make another selective color layer. [layer > new adjustment layer > selective color]
reds:
-100
+25
+61
0
yellows:
-35
-35
-38
0
neutrals:
-8
-16
-9
0
5. make a color fill layer. [layer > new fill layer > solid color.]
#200909 set to exclusion 100%.
duplicate that layer and set to 30%
6. make another color fill layer. [layer > new fill layer > solid color.]
#a99090 set to soft light 100%
7. another color fill layer. [layer > new fill layer > solid color.]
#e5c5c5 set to color burn 40%
8. another color fill layer.
#82a88b set to overlay 50%
9. another color fill layer.
#13122e set to exclusion 40%
10. another color fill layer.
#7a7a7a set to linear light 100%
11. make a levels layer. [layer > new adjustment layer > levels]
RGB:
input levels:
26, 1.00, 230
output levels:
16, 232
12. make a channel mixer layer. [layer > new adjustment layer > channel mixer]
red:
red +93
green +9
blue -13
constant +7
green:
red -9
green +110
blue -7
constant +5
blue:
red -5
green +7
blue +94
constant +7
13. make a new curves layer. [layer > new adjustment layer > curves]
this part is kind of hard to understand so bear with me
RGB:
click anywhere near the line. then in the output box put in 48. in the input box put in 58. click anywhere ELSE near the line. then put in
output: 105, input: 102
red:
output: 40, input: 56
and
output: 197, input: 193
hopefully this isn't 2 confusing..you should realize that you have 2 curves in your line. it should look something like this.
green:
output: 45, input: 51
and
output: 189, input: 182
blue:
output: 38, input: 45
and
output: 185, input: 174
set this curves layer to opactiy 50%
and you're DONE! (:
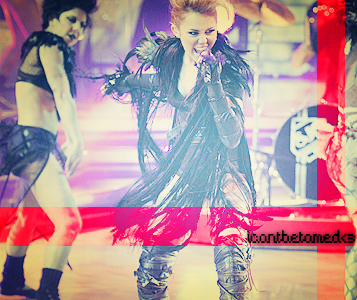
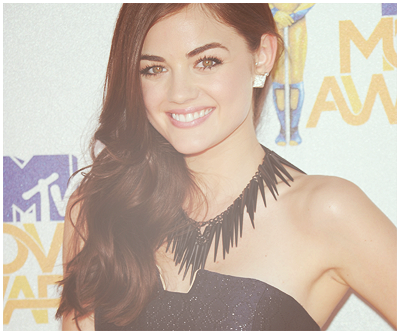
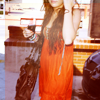
other examples:


^ALL SLIGHTLY ADJUSTED
THIS MAY NOT WORK ON ALL PICTURES. while i was trying to make other examples with this coloring it didn't really work out a lot of times it makes some pictures look really blue-ish. you'll have to adjust the coloring to fit whatever picture you're using. usually if it's too blue, go to the first selective coloring layer and in the neutrals, bring down the "yellow" [-11] to like +10, or whatever works.
EDIT BY VERONICA;


For those of you who don't have cs3 photoshop you can use the PSD. You cannot transfer the selective coloring part but you can transfer the other parts.
And for those of you who just like to press play as an action and are too lazy to drag each layer I made you an action If it doesn't work please let me know.
coloring #1
people requested this. so here we gooo.
this is NON-TRANSLATABLE.
it will work only on any version of photoshop. [not for photoshop elements. i don't think that has selective coloring.]
i use photoshop cs3 extended.
how to go from
to 1. sharpen your base if needed. then duplicate your base and set to screen 50%. you can adjust the opacity depending on how dark your picture is.
2. make a new selective color layer. [layer > new adjustment layer > selective color]
reds:
-100
+18
+17
+17
yellows:
+100
+22
+100
+13
neutrals:
+35
+14
-11
0
3. make a new color balance layer. [layer > new adjustment layer > color balance]
midtones:
-34, +6, +16
shadows:
+17, +8, +18
highlights:
0, +12, +11
don't do anything to the preserve luminosity box, just leave it checked
4. make another selective color layer. [layer > new adjustment layer > selective color]
reds:
-100
+25
+61
0
yellows:
-35
-35
-38
0
neutrals:
-8
-16
-9
0
5. make a color fill layer. [layer > new fill layer > solid color.]
#200909 set to exclusion 100%.
duplicate that layer and set to 30%
6. make another color fill layer. [layer > new fill layer > solid color.]
#a99090 set to soft light 100%
7. another color fill layer. [layer > new fill layer > solid color.]
#e5c5c5 set to color burn 40%
8. another color fill layer.
#82a88b set to overlay 50%
9. another color fill layer.
#13122e set to exclusion 40%
10. another color fill layer.
#7a7a7a set to linear light 100%
11. make a levels layer. [layer > new adjustment layer > levels]
RGB:
input levels:
26, 1.00, 230
output levels:
16, 232
12. make a channel mixer layer. [layer > new adjustment layer > channel mixer]
red:
red +93
green +9
blue -13
constant +7
green:
red -9
green +110
blue -7
constant +5
blue:
red -5
green +7
blue +94
constant +7
13. make a new curves layer. [layer > new adjustment layer > curves]
this part is kind of hard to understand so bear with me

RGB:
click anywhere near the line. then in the output box put in 48. in the input box put in 58. click anywhere ELSE near the line. then put in
output: 105, input: 102
red:
output: 40, input: 56
and
output: 197, input: 193
hopefully this isn't 2 confusing..you should realize that you have 2 curves in your line. it should look something like this.
green:
output: 45, input: 51
and
output: 189, input: 182
blue:
output: 38, input: 45
and
output: 185, input: 174
set this curves layer to opactiy 50%
and you're DONE! (:
other examples:
^ALL SLIGHTLY ADJUSTED
THIS MAY NOT WORK ON ALL PICTURES. while i was trying to make other examples with this coloring it didn't really work out a lot of times
it makes some pictures look really blue-ish. you'll have to adjust the coloring to fit whatever picture you're using. usually if it's too blue, go to the first selective coloring layer and in the neutrals, bring down the "yellow" [-11] to like +10, or whatever works.EDIT BY VERONICA;
For those of you who don't have cs3 photoshop you can use the PSD. You cannot transfer the selective coloring part but you can transfer the other parts.

And for those of you who just like to press play as an action and are too lazy to drag each layer I made you an action
If it doesn't work please let me know.